

LAKN Xiaomi M365 Circuit Board & Pro M365 Scooter Pro Accessories, Screen Cover Xiaomi Circuit Board
Product Description
LAKN Xiaomi M365 Circuit Board & Pro M365 Scooter Pro Accessories, Screen Cover Xiaomi Circuit Board
- Compatible with Two Models: The newest model of Circuit Board has a screen cover design that is fit for Xiaomi Mijia M365 and Xiaomi M365 Pro electric scooter. The Circuit Board is a replacement of Xiaomi M365/M365 Pro Electric Scooter.
- Upgraded Model of Circuit Board: This is the newest model of Circuit Board with a screen cover, designed for Xiaomi Mijia M365 and Xiaomi M365 Pro electric scooter. No need to do any firmware upgrade after you replace the Circuit Board. Avoid the complex steps and save your time.
- High Quality and Durable: Newest model of circuit board shell made by high quality metals and the main board is made by PCA materials. Durable and waterproof. Favorable effects in anti-oxidation. Specially designed for original Xiaomi Mijia M365 and M365 Pro Electric Scooter.
- Beautiful Appearance: The newest model of Xiaomi M365 / M365 Pro circuit board has a cool, clear display dashboard that shows all the functionality and speeds. This product is perfect to work with the electric scooters. Economically practical with more safety and convenience.
- Package and Specification: The package includes 1 dashboard, 1 dashboard shell, 1 Screwdriver and 1 specification booklet. Note: If you don't know how to connect to the app, please see the instruction in the specification booklet, it provides a step by step guide, making it easier to install. We guarantee 100% satisfying customers. Please contact us if you have any questions.
This product is suitable for m365 mill scooter, which is the replacement part of the meter panel of Xiaomi scooter. Easy to install, remove the damaged circuit board or cover in the instrument panel, and insert it directly into the device, the operation is simple and convenient.
Installation Steps:
1.Take off the stock display covers (both top and bottom).
2.2. Remove the screw at the bottom of the panel.
3.Inspect the display and make sure everything looks good after transit.
4.First, install the connector. Make sure pins are aligned correctly (2nd pin from the left on the board has to be untouched!). Insert the connector and install the screw you have removed in step 2. Press the blue button and make sure the screen lights up and works properly as per pictures.
5. Remove adhesive tape which came with the unit. Place the new display panel on and make sure it's fully inserted in place. Watch out for connector cables.
6. Insert button (remove tape again) and light extensions to your bottom panel cover.
7. Reapply the bottom panel cover you removed in step 1.
Package Include:
1 Circuit Board
1 Screen Cover
1 Screwdriver
1 Set of manuals
Technical Specifications
You might also like
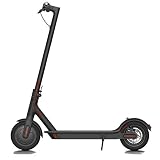
Xiaomi Mi Electric Scooter, 18.6 Miles Long-range Battery, Up to 15.5 MPH, Easy Fold-n-Carry Design, Ultra-Lightweight Adult Electric Scooter (US Version with Warranty)
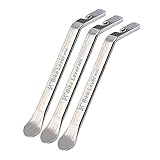
Tragoods Premium Bicycle Tire Lever Tyre Spoon Iron Changing Tool, Bike Tire Levers Premium Stainless Steel Levers to Repair Bike Tube, Best Tire Changing Tool, Set of 3

Yifant Inner Tube 8 1/2 x 2 Pack of 2pcs for Xiaomi M365 Smart Electric Scooter Inflated Spare Tire Replace Tube
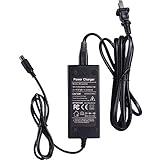
Willing-Fly Charger for Bird & Lime Scooter Charger 42V 2A - Bird,Lime,Lime-S,Skip,Spin Xiaomi M365 - Electric Scooter Charger - Brid Charger,Lime Charger
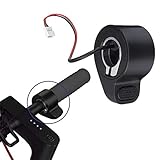
DEYIOU Electric Scooter Throttle Thumb Accelerator Speed Control Replacement Part for Xiaomi Mijia M365 Scooter

42V 2A Power Adapter for Bird & Lime Charger - Bird, Lime, Lime-S, Skip, Spin Xiaomi M365 - Charger - Bird Charger, Lime Charger

Slime 2045-A Metal Valve Extenders, 1-1/4"