

iPower 7 Day Heavy Duty Digital Programmable Electric Timer, Indoor Dual Outlet Switch for Lights, Appliance, Pool Pump, 125VAC, 15A, 60 Hz, 1725W, 2-Pack, white
Product Description
iPower 7 Day Heavy Duty Digital Programmable Electric Timer, Indoor Dual Outlet Switch for Lights, Appliance, Pool Pump, 125VAC, 15A, 60 Hz, 1725W, 2-Pack, white
- 8 ON/OFF Programs, 7-DAY Programmable, Flexible Time Settings for Minutes, Hours, Days. Settings Automatically Repeat Weekly & Backed up in Case of Power Failure
- LCD digital display, dual outlet. Grounded 3-Prong design to ensure safety use
- Automates fans, lamps, lights, sprinklers, seasonal/ decorative/ holiday & Christmas lighting, illumination, heater, A/C, and other electronics to help reduce energy and save money. Essential for everyday home kitchen use, all hydroponic system applications
- Rated Voltage: 125VAC, 15A, 60 Hz, 1/2HP, 1725W
- Package Includes 2 pack timers
Specifications:
- Length: 3 inches
- Width: 2.8 inches
- Height: 3 inches
- Weight: 8 ounces
- Rated Voltage: 125VAC, 15A, 60 Hz, 1/2HP, 1725W
Random ON/OFF for Security:
Â
- Press HOUR and WEEK simultaneously to activate or deactivate Random feature
- Randomly turn on and off the lights to make it appears as if you're still home
Â
Daylight Savings Time (DST) Switch:
Press HOUR and MINUTE simultaneously to activate or deactivate to standard time
2 Grounded Outlets are Controlled by Same Program
Small Red Led light is Output Indicator
Â
Programming Example:
Assume it is 08:05 AM, Monday, and you want to set timer at 8:20AM ~10:40AM on Mondays
1. Reset the timer
2. Hold CLOCK and press WEEK until Mo shows on the top of the LCD
3. Hold CLOCK and press HOUR until 8:00 AM shows on the LCD
4. Hold CLOCK and press MIN until 8:05 AM shows on the LCD
The clock is now correctly set
5. Press PROG and the LCD displays 1 On
6. Press WEEK until Mo displays on the upper position of the LCD
7. Press HOUR until 8:00 displays in the middle and AM displays on the left side
8. Press MIN until 8:20 displays in the middle and AM displays on the left side
9. Press RROG and LCD displays 1 Off
10. Press WEEK until Mo displays on the upper position of the LCD
11. Press HOUR until 10:00 displays in the middle and AM displays on the left side
12. Press MIN until 10:40 displays in the middle and AM displays on the left side
13. Press CLOCK to quit programming and return to clock display
14. Press ON/OFF/AUTO until Auto is displayed on LCD
15. Plug the timer into an electrical outlet
16. Attach an appliance to the timer. Make sure the appliance is switched on
Â
Note: If you plug the timer between 8:20 AM and 10:40 AM, it will not turn on the appliance right away so as to avoid power surge.
Technical Specifications
You might also like

iPower GLTIMEDWEEK Dual Outlet 7-Day Digital Timer
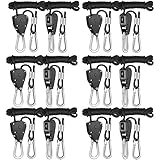
iPower GLROPEX6 Pair of 1/8" Heavy Duty Adjustable Rope Clip Hanger w/Metal Internal Gears,8-Feet Long,6 Pack

iPower Exhaust Fan Speed Controller Adjuster Duct Inline Fan Vent Blower 350W

AcuRite 00613 Indoor Humidity Monitor

General Hydroponics pH Control Kit

HydroDynamics Clonex Rooting Gel, 100 ml

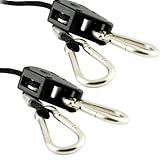
VIVOSUN - 6 Pairs 1/8 inch Adjustable Heavy Duty Rope Hanger - Reinforced Metal Internal Gears Ratchets, Loose-Proof Design, 8-ft Long & 150lbs Weight Capacity (Upgraded Version)

Simple Deluxe 2-Pack 6" 2-Speed Adjustable Tilt Whisper Quiet Commercial Clip-On-Fan
Apollo Horticulture GLRP18 Pair of 1/8" Adjustable Grow Light Rope Hanger w/ Improved Metal Internal Gears
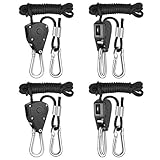
iPower GLROPEX2 Pair of 1/8" Heavy Duty Adjustable Rope Clip Hanger w/Metal Internal Gears,8-Feet Long,2 Pack